Simple winter hat (toque) for my mom, with a pom pom and tutorial


I made this toque (called a “beanie” in the US, but a toque in Canada, where I’m from, pronounced “tooke”) for my mom for her birthday. I’m making her a bunch of hats for the cold weather that just started. I used variegating yarn with burgundy, whites and navy blues. I like how it turned out. It’s cute. I used the 36 peg Knifty Knitter green loom and just knit and purl.

I made the pom pom by wrapping yarn around a tapestry needle on my index finger, sewing through it while its still on my finger, tying the edges together (the starting yarn with the tapestry needle, and the ending yarn that I ran through the ball on my finger) and then cut it off, tightened the knot I made, and then cut the rest of the yarn so it opened up into a pom pom. There are much easier ways to do this, but my pom pom makers have disappeared.

OLYMPUS DIGITAL CAMERA

It’s really cute. My mom and I both have small heads, so I used the 36 peg loom. Any round loom will do.

The Pattern

What you need

About 100 yards of yarn or wool.

A tapestry needle.

A loom knitting tool.

Any size round loom, preferably with an even number of pegs.

Purl

E-wrap knit

E-wrap cast on

Gather bind off

How it’s done

E-wrap cast on. You can also use the chain cast on if you prefer. It doesn’t really matter. All knits are e-wrap knits, but you can use any you prefer for the garter stitch. E-wrap knits are fastest.

Knit 2, purl 2 in the round for as long as you want the brim to be. I made mine about an inch. If you’re using a loom with an odd number of pegs, knit 2, purl 2 until the end, and purl the past peg, then start the next row and knit 2, purl 2 until the end, and purl 1. This is what you would do on a 41 peg loom.

Knit a row in the round. Wrap the pegs and knit over.

Purl a row in the round. Purl each peg by putting the knitting tool underneath the yarn on the peg and then grab the working yarn with the tool, pull it up through the yarn on the peg, take the new loop and replace the old loop with it on the peg. Tutorial here with pics and a video. It seems slow at first, but you’ll get faster as you learn it

This is called “garter stitch” and is used in many patterns.

Keep knitting a row, then purling a row until the hat is the desired size.

Gather bind off (put the tapestry needle through the first peg, move the peg onto the yarn on the needle and pull it off the peg, do the same for peg 2, tightening as you go around the loom so at the end the circle is closed)

Flip the hat inside out and run the tapestry needle with yarn on it through a few times to close the circle completely.

Make a pom pom any way you desire, if you want a pom pom.

Attach the pom pom to the top centre of the loom and sew it on. I had two long pieces of yarn on each side of the pom pom, so I put them on the tapestry needle, pulled through to the inside of the hat with each side, and tied them right a few times.

You’re done!

OLYMPUS DIGITAL CAMERA

The finished product. The e-wrap knit 2, purl 2 creates a bit of a wavy edge, which I like. If you want it to be straight, you can use the standard knit on the loom rather than e-wrap, or even flat knit. The brim doesn’t have to be made, the garter stitch doesn’t curl, so you can do the entire thing in garter stitch, but I wanted a brim.

It’s all up to you! Now my moms first hat is done and I’m going to move on to a second for her. Her birthday is coming up soon!

Striped hat with tutorial/pattern


Well, I frogged the sunset shawl/scarf and started working on the Mostly Harmless scarf, from The Invisible Loom. I’ve got 2 out of 24 repeats done, so I took a break and made this hat.

It’s November 1st and it’s snowing out. So I need to make lots of hats!
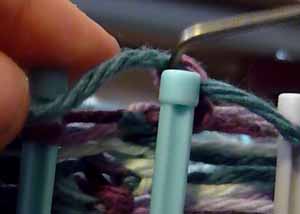
I made this awesome striped hat in about 2 hours today. Here it is!


OLYMPUS DIGITAL CAMERA OLYMPUS DIGITAL CAMERA OLYMPUS DIGITAL CAMERA


Me looking sexy wearing my new, warm, hat.

I just worsted weight wool for this, just spares I had in my stash. I used a 36 peg Knifty Knitter Loom (the green one) but it can be adapted for a 41 peg loom, too. I have a small head! I can almost fit into the 31 peg loom hats. I made my first hat on a 31 peg loom, and it had some stretch, but it fit. I’m child sized. I even wear a child sized riding helmet. Here it is, and yes, it has the pony on the side!

helmet

I got it from Greenhawk in Beamsville. It’s super comfy. I don’t wear it to shows, I have a black velvet helmet for that. I’d get laughed at at shows if I wore my My Little Pony helmet!

Okay, onto the pattern.

What you need/need to know

About 150 yards of yarn, total. I had some scrap lying around. This is a good scrap project.

A round knitting loom of your size of choice, it doesn’t matter. Even pegs are better than odd, but either work.

E-wrap cast on.

Gather bind off.

E-wrap  knit (all knits are e-wrap knits)

Purl

Knitting tool

Tapestry needle

About 2 hours

Changing colours

What I do to change colours is cut the old yard and tie the new yarn to it with a square knot, so its secure, and start knitting with that.

The Pattern

All knits are e-wrap knits

E-wrap cast on all pegs in the round in Colour A (which was the burgundy for me). You can use any cast on you like, but I used the e-wrap one.

Rows 1-6: Knit 1, purl 1, in the round. If you’re using a loom with an odd number of pegs, knit the last peg and continue knit 1 purl 1 from the starting peg.

Row 7: Change to Colour N, which was the black for me, and e-wrap around.

Row 8: Purl around

Row 9-11: Knit

Row 12: Change to Colour A and e-wrap around

Row 13: Purl around

Row 14-16: Knit

Repeat rows 7-16 twice.

Row 18: Change to Colour B and e-wrap around

Row 19: Purl around

Row 20-24: Knit 2, purl 2. If you’re using an odd numbered loom, add an extra knit on the last peg and continue in Knit 2, Purl 2, at the beginning of the next row.

Cast off using the gather bind off method.

Flip the hat inside out and tie the top together. Add a pom-pom if you want!

It’s done!

OLYMPUS DIGITAL CAMERA

The finished hat. The black wool has spots of colour in it.


Simple loom knit shrug with a video and written tutorial


I’ll post the video at the bottom of this, after my pics. There is a link if you’d rather just go to Youtube.

This shrug took me about two days of off and on knitting. I didn’t follow the video exactly. Here are some pics, then I’ll do a written tutorial.

OLYMPUS DIGITAL CAMERA OLYMPUS DIGITAL CAMERA

The shrug on the loom, and showing the open part.

OLYMPUS DIGITAL CAMERA OLYMPUS DIGITAL CAMERA OLYMPUS DIGITAL CAMERA


Wearing the shrug. Some crappy bathroom pics, sorry!

TUTORIAL

This is how I did it, but I used the video below for inspiration. I didn’t have enough yarn to make it long sleeved (note to self: get some yarn that weight and make a long sleeved one, stat)

I used a 36 peg Knifty Knitter round loom, the green one. (One of my only remaining Knifty Knitter looms! I gave a bunch to a friend to learn on) All knits are e-wrap knits.

Cast on the entire loom in e-wrap, or whichever cast on you prefer. It actually doesn’t matter.

PART 1 – In the round

Rows 1-10: Rib stitch (knit 2, purl 2, repeat in the round)

Rows 11-30: Garter stitch (knit one row, purl the next row, repeat in the round until you have the size you desire, or 20 rows. I’m small, so this is made in my size)

PART 2 – Flat panel

What you made in Part 1 is the first sleeve. Part two is the open part of the shrug, so you’re knitting it in a flat panel. Knit from peg 1 to peg 36, then back around from peg 36 to peg 1. This is the pattern I used, from the tutorial. Place a marker on peg 5 and peg 31.

Row 1: Knit 5 pegs, purl 26, knit 5 pegs.

Row 2: Purl

Repeat this until the shrug measures the size you want it to be. I knit about 60 rows (30 repeats)

PART 3- Back in the round

Now, this is the second sleeve. Knit in the round, so you’re connecting again. It’ll look like this:

OLYMPUS DIGITAL CAMERA

Rows 1-20: Garter stitch (knit one row, purl one row, in the round)

Rows 21-31: Rib stitch (knit 2, purl 2, all the way around)

Cast off. I used a simple bind off, but a crochet cast off would look good if you used a crochet cast on. Try on, and look fabulous.

Snapshot_20141014

Here’s the video tutorial: It’s very useful, especially if you’ve never purled before, they give a good tutorial. It’s a great video. (Not mine, but I love it)


Small gauge sock loom comparison – Knifty Knitter vs Bufanda


I’m comparing two small gauge looms for knitting socks.

In the left corner:

OLYMPUS DIGITAL CAMERA

The Bufanda (“Spanish loom”) smallest loom, originally with 22 pegs, added pegs to make it 44)

This loom is great. Except for putting the extra pegs in. I could get them in part ways with my hand and then had to (literally) hammer the fucking pegs in. The extra pegs are the pink ones, the Bufanda knitting loom kit (which is super) comes with a bag of extra pegs, allowing for customizable looms. I love this feature! I hate the Martha Stewart knitting loom set, its so cheap, but these looms, which cost no more than a set of Knifty Knitters (for 4, the same size, in better colours, with the extra pegs) plus shipping (that got me a bit – shipping to Canada is EXPENSIVE, but worth it) are great.

Other than nearly breaking my thumb hammering the fucking pegs in, it took a hammer and all my 105lbs to get the pegs in, and a lot of time, I much prefer this for socks. I’m using the knitting tool shown in the pic, your standard Knifty Knitter tool. I can’t find my CinDwood one, or I’d use that, because its much narrower at the end. I also lost most of my knitting tools, and need to buy some more. (My favourite is the Knifty Knitter tool, but mine is getting old and bendy, more about that later)

It’s much easier to wrap these pegs than with the Knifty Knitter sock loom. I don’t use a tool (empty pen or straw), just my skinny fingers. I have long, thin, fingers, which helps in knitting on the loom. Wrapping the pegs: Easy. Knitting – (flat knit or e-wrap knit) Easy. Purling – A little harder, but thats because I REALLY need a new tool, but easier than on the KK sock loom. It doesn’t bend my tool when I purl, and I’m wrapping around a medium tightness. Not too loose, not too tight. Getting the wool over the pegs is easy, and they don’t slip much, the ridges at the top stop that.

Overall: The better of the two. Much cheaper, customizable, and you can get it here, at the Bufanda store. Depending on where you live, the entire set of 4 looms with the extra pegs (and knitting tool) may cost LESS than the KK Sock Loom. Also, because every other peg is a different colour, it makes the seed and rib stitch really easy to keep track off. Purl on pink, knit on blue, for example.

OLYMPUS DIGITAL CAMERA


The Knifty Knitter Sock Loom (or whatever brand you buy)

This thing is complicated. I set it up for my size, and measured with my foot through it. It took me forever to screw the thing back together, with a lot of cursing and chasing my cats around to get the parts back. Interesting idea, sucks in execution. It’s complicated, it’s annoying, and it takes a lot of co-ordination to get together, and pair that with a lack of patience: This thing is getting thrown across the room.

Now, knitting on it isn’t much better. See how tiny those pegs are? Well, the top is circular, and you have to wrap fairly loosely, or you will not get a single loop over after you cast on. I cast on at medium looseness, I don’t knit terribly tight, and it turns out fine, and I had major issues and it bent my knitting tool trying to purl. Now try to get the tool (the one I use is the same one that came with it!) under the pegs, the divots are useless and it takes a few attempts. Granted, I’m not used to it, but the metal on metal is slippery and is a royal pain in the ass. Yes, the metal is less likely to break, but it doesn’t give at all, and can cause some frustration. I prefer the use of rubber pegs, like with Cindwood. They have good grip, don’t slip, but let you easily knit.

Knitting (e-wrap or flat): Hard. It results in both loops going over half the time and having to re-wrap and re-knit. I couldn’t even get much done. I tried a tiny crochet hook instead of the knitting tool, and it didn’t fit. Purling – Damn near impossible. Getting the tool under the yarn on the peg was a joke. The thing is too small. I could form the loop and get it over the peg more easily than on a knit stitch, and dropped less stitches. It took ages. I got fed up and put this thing back in my chest to never touch again.

Conclusion: This thing is expensive, even on eBay. I got mine for $7 when it was on for half price and I had a 40% off coupon. It’s more expensive than entire set of looms. It’s up there with the All ‘n One Loom which I own, but lost half the parts to, so only use for small gauge straight stuff.. Anywoo… It’s frustrating to put together, but doesn’t require the physical strength of putting extra pegs in the Bufanda loom. It’s customizable a bit, but only to the size of your foot. The Bufanda loom, well, its only one size, a drawback, but with socks, its more forgivable. That is probably the only positive to this thing, it can be adjusted to foot size. It’s hard to use, and its hard to loop yarn over. It seems to only allow very thing yarn, huge drawback.

The winner is..

Bufanda

I’d rather have a one-size loom that I can knit about the same gauge in than the frustration of this sock loom. It’s a good idea in theory, but makes me so angry. I’ve used a lot of looms, and the sock loom is the most frustrating.


Rainbow socks! With pattern


Since I’m always losing my socks, I decided to knit some. I used the Knifty Knitter small loom (24 peg) and made these. They are done in garter stitch, only go up to the ankle (the way I like my socks) and will be good for summer, too. I did a loose garter stitch, so they aren’t very tight, and they’re rainbow and happy. I love them. They took about 3 hours total, but I kept getting distracted, so it took a little longer.

Here’s some pics.

OLYMPUS DIGITAL CAMERA

On the loom


OLYMPUS DIGITAL CAMERA


On my feet!


Here’s the basic pattern I used

For the ankles, I did a garter stitch after an e-wrap cast on for 20 rows. Knit one (row 1) purl one (row 2) for 20 rows.

Then I did the heel, which is the most complex part.

Knit in short rows 12 stitches. You can do this in garter stitch, or if its easier, just knit it. I did it in garter stitch.

Knit 12 across. Purl 12 back. Knit 12 acrss.

Take pegs 1 and peg 12 and move them to peg 2 and peg 11.

Purl across, knit back, purl across.

Take peg 2, put it on peg 3, take peg 11, put it on peg 10.

Knit across, purl back, knit across.

Take peg 3, put it on peg 4, take peg 10, put it on peg 9.

You should have 3 empty pegs on each side.

Purl across, knit back, purl across.

Go down, and pull up from what’s already knit onto peg 1, 2, 3, 4, 5, 8, 9, 10, 11 and 12. This sounds complex, but you’re just going down and placing an existing loop on those pegs. Knit over if there’s a loop on the peg.

Then you start the foot. The starting peg is at a different one now, so place a marker on it (it should be at 4) and start the garter stitch again. My feet are women’s size 7.5, or men’s size 6 (well, kids), so for worsted yarn 4, with the stitch I used, I did 35 garter rows (one knit = 1 row, one purl = 1 row).

Do a bind gather up and flip  inside out and tie off.

You have socks!

OLYMPUS DIGITAL CAMERA

I always keep track of counting so I can make both socks identical.

OLYMPUS DIGITAL CAMERA

And any yarn makes a nice sock. Light yarn makes good for spring and summer socks, heavy yarn is great for Canadian winters. I love this pattern and have always used it for socks. Be creative!


April 27 – Whatcha loomin?


I do have a guest blogger coming on, she just needs to pick a nick. So, here’s whats on 3 of my many looms.

On the Cindwood Loom, I have 1 1/2 of many wedges going for my Pi Circle sweater. After the second wedge, I start making armholes. It’s a fairly quick, but repetitive, and long knit. There isn’t a lot of purling, but there is a lot to it, it’s pretty big. I did a lot of working on it while I watched Transamerica, a funny and moving movie. This shows where I started the second wedge, how it’s turning, and the circle starting to take shape. Sorry for the top blur, I can’t get the lens on my phone camera clean, and I still haven’t charged my good camera. I’ve been working 9 hour days and it’s brutal.

20140427_170805_resized


It’s not going to be 5ft tall when it’s done, but it’ll be big. I love circle sweaters. This is my big project. I just ran out of my first ball of wool today. I have 5 more.

Next, on the 41 peg, yellow Bufanda 29cm (circumference) loom, which I’ve upped to 82 pegs, is my mini wingspan, which will be more like a scarf. I was thinking of making 2, and having a diamond scarf, but I realized I could make a mitered one much easier, and wingspans rock. I might add a button and make it a cowl. You never know! It’s super cute. I’d have to find a button as cute as the yarn.

wingspan

I just love that yarn.You can see where I added pegs, all of the pegs pop out, and the yellow ones are original, they come out too, but the pink ones are the extra’s. I kinda wish I had made it a bit bigger, the wings, and had a couple of wings, to make a different wingspan. This will leave me with 9 wings when I’m done. It’s pretty time consuming.

Next, and last, is a scarf with lace I’m working on. I love the yarn, its JC Brett’s marble red, and has gentle colour changes in the dark red as I go down. It’s pretty subtle, so you may have to zoom in to get a good look. I love the JC Brett’s yarn and was so sad when I spilled a smoothie and wrecked an entire ball. Washing and drying it just made it worse, so I had to dump it. Damn. I work on this once in a while, I’ll do a bit. It’s going to be a scarf. It’ll probably take me until next winter to finish it. Verrrrry repetitive.

scarf

It’s on the Martha Steward custom knitting board I made, but I don’t have it in double knit, this is single knit in knits and purls (sort of garter stitch, knit the lace, purl, knit, purl) so it doesn’t wrap, with a garter stitch bottom and top. I might add fringe, but does this scarf need it? I think its too sophisticated for that. In the middle, you can see a part I frogged a little bit. Mistakes just mean its homemade.


Drop Stitch Infinity Scarf FINISHED with Pattern


I finished it! In a couple days! It looks cute, and its warm. I made it to my height (I’m 5’3) and then stitched it into an infinity scarf.  Sorry I look half dead in the pics, I had some dental work done and the side of my face is swollen and I’m stoned on painkillers. 1 Tylenol 3 and I can’t drive. So I’ve been at home the past few days.  It’s a nice fall scarf.


20140328_172428_resized

Wrapped around three times.

20140328_172320_resized

Wrapped around twice.

20140328_172553_resized

Hanging on the door, to give you a size idea

The Pattern

What you need

A loom with at least 12 pegs and a knitting tool

A tapestry needle or a crochet hook

Yarn of your choice, any kind will do, thinner looks lacier, chunkier makes a warmer scarf, I used normal worsted

Stitches Used

E-wrap knit stitch

Knit stitch (optional)

Purl

Drop stitch

For those that have never done the drop stitch, I refreshed my memory with this youtube video. It’s a fantastic video.

Okay, let’s go.

Cast on 12 stitches in the flat  in any manner you’d like, I used the e-wrap cast on.

All knits are e-wrap knits unless otherwise specified. This is an advanced beginner pattern due to the drop stitch.

1 Knit

2 Purl

3-8 Repeat 1-2

9 On each peg, knit stitch (not e-wrap), and then wrap it 5 times (beginning of the drop stitch)

10 Purl and release the 5 wraps (explained in the video)

(9 and 10 are the drop stitch itself)

11 Purl

12 Knit

13 Purl

14 Repeat 9-13 Until the scarf is as long as you want it.

Cast off in your preferred way when the scarf is at the length you want. You can sew it together into an infinity scarf or leave it as a regular scarf. You’re done!

I like this scarf because the drop stitch made it knit up really fast. It was confusing at first and looked so sloppy when I started with the drop stitch, but after a few, it started to take shape and look neat. I highly recommend using the tutorial I posted. She’s really good. I just got one of her books, its amazing. (It’s out of print and I had to find a place that’d ship to Canada! I paid a few bucks for it, but its worth it) It was an easy knit once I got the drop stitch down. Here’s mine at the very beginning:

20140323_145400_resized

Looks like crap! But as it grows, it looks nicer. You can also make the drop stitches longer or shorter by increasing or decreasing wraps around the pegs.

Yoga socks! With pattern and tutorial


OLYMPUS DIGITAL CAMERA

Toes up for yoga socks!

These are basically socks with no heel or toes, good for not slipping. I love ’em, and I’m not usually the pink yarn type.

Here are some more pics.

OLYMPUS DIGITAL CAMERA

From the left

Sorry about my gross toes..

Here’s what I use to keep track of my patterns. Windows sticky notes!

pattern

I’ll explain it in more detail. I cast on using the e-wrap cast on. Then for rows 1-4 I did the rib stitch, which is e-wrap peg one, purl peg 2, e-wrap peg 3, purl peg 4, continue around.

Here’s how to purl on a knitting loom.

OLYMPUS DIGITAL CAMERA

Rib stitch, the cuff

That’s the cuff. Next is the leg part. I did the flat knit stitch for 30 rows (as its smaller than the e-wrap)

OLYMPUS DIGITAL CAMERA

After I had it at the length I wanted, I bound off pegs 1-12, shown in the picture above.

Then, I e-wrapped pegs 12-24, then used the flat knit stitch for 6 rows, and then continued in an e-wrap around until there were wraps on every peg, and 2 on others. I knit over 2 on the ones with others (13-14) and then did one entire row of e-wrapping.

Then I did the flat knit stitch for another 20 rows, for the foot.

I finished it off with the rib stitch, again, for 4 rows. I cast off using the crochet cast off, loosely, so there was some stretch.

I used this pattern on Ravelry as a reference.

OLYMPUS DIGITAL CAMERA

Comfy, no slip, yoga socks!

Tutorial – Flat knit stitch


Since my next pattern (yoga socks) are going to include the flat knit stitch, I did a little tutorial. It’s a really easy stitch. Here’s the video in mp4 format. I’ll explain it in text and JPG as well, if you don’t like videos.

Here it is on youtube

Okay, in JPG. I’ve only got two!

fn1

First , lay the working yarn across the loom, above the yarn on the pegs. Not too tight, or it gets harder and harder to work with.

fk2

Next, knit over.

414037

It looks like this!

Purling on a Knitting Loom


I’ve got videos and GIF’s, and this is the third time I’ve written this, since my server keeps crashing every time I put this up. Grr.

First, the proper way, second, my way.

The proper way

http://www.youtube.com/watch?v=CG4ILUAEIb0

Step by step

 purl-proper1

The working yarn is blue/teal, and the yarn on the peg is purple.

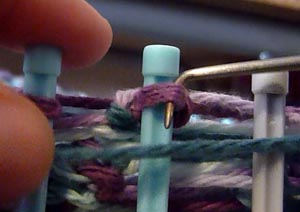
First, put your hook in the front of the peg, and grab the working yarn with the hook, and pull it up and through the yarn on the peg.

purl-proper2

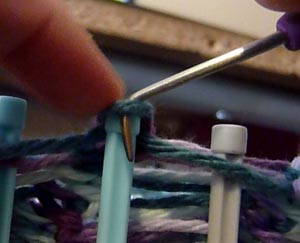
Pull the working yarn through the yarn on the peg and form a loop.

purl-proper3

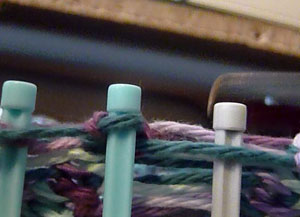
Pull the loop of the working yarn off and over the peg, so no yarn remains on the peg. Keep the loop open.

purl-proper4

Place the loop you created with the working yarn back onto the peg.

purl-proper5

Tighten the yarn, you’ve just created your first purl stitch!

Cheating, the way I do it (I have small fingers)

http://www.youtube.com/watch?v=GrlJ_DrnPIs

Step by Step

purlcheat1

You start off exactly the same way, by pulling the working yarn up and through the yarn on the peg.

purlcheat2

The second step is exactly the same, too, create the loop.

purlcheat3

In the third step, instead of using the knitting tool, I grab the loop and pull it over with my fingers, back onto the peg.

purlcheat4

Instead of fighting with the knitting tool, I just use my hands.

purlcheat5

Place the loop on the peg, and tighten, your very first purl stitch!