
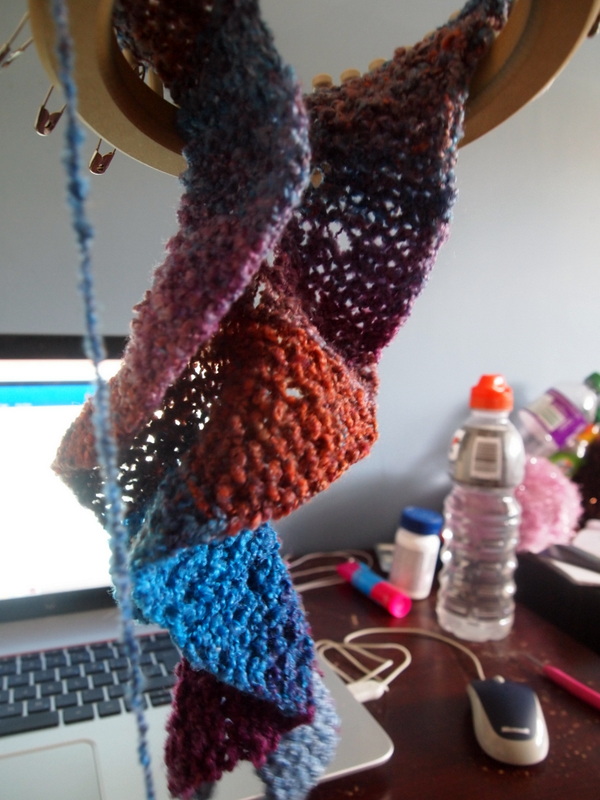
Finished!
I wanted to make a keyhole scarf for a while but I couldn’t find a pattern to suit me, so I used a few different patterns and made my own up out of it. I wrote down my steps in a notebook, which leads to a very confusing mess trying to translate it in type!
A keyhole scarf is a scarf that has a slit, so you can wrap it, put the one end through the slit, and it stays in place. This is a quick knit. It uses the garter stitch (knit one row, purl one row) and some increases (M1 and double e-wrap) and simple decreases. I’ll explain it throughout this tutorial/pattern. It’s pretty simple and I’d say a confident beginner could do it. It took about 200 yards of yarn and is about 38 inches long.
What You Need
- A loom with at least 18 pegs. I recommend a 1/2″ gauge loom for a worsted weight or a 5/8″ loom (like a Knifty Knitter) for a bulkier yarn. If you use anything smaller or bigger, the finished scarf will change in size. The example was knit on the 66 peg 1/2″ CinDwood loom.
- A measuring tape. I give measurements to the yarn I used, which was Impeccable Worsted. Your yarn may vary in thickness, your loom may also change the size of the stitches.
- A knitting tool, for, well, knitting.
- About 200 yards of yarn. It can be made bigger or smaller. I recommend worsted or bulky.
- Crochet hook if you choose a crochet cast on/off.

What it looks like when it’s done
What Stuff Means
- Sl: Slip the stitch (done at the beginning of rows, you skip the first peg, this gives a nice, braided edge)
- HS: Half stitch. Take the yarn from back to front and knit over without wrapping the yarn. This is done at the end of rows for a nice, braided edge.
- K: E-wrap knit
- P: Purl (tutorial here)
- M1: Make one. This is done at the beginning of rows where there is an increase. You take the last peg, move it to the empty peg beside it, and then reach down with your knitting loom and grab the “bar” you’ll see, twist it and place that on the empty peg, which will be the second peg. Here’s a good video tutorial.
- Inc1: Increase by one. This is done at the end of rows and you knit the entire row to the last stitch (no half stitch) then wrap the next empty peg twice, and knit the bottom loop over the top loop.
- D1: Decrease one. Take the peg second to the last (at the beginning or end of the row) and move it to the last peg. Knit the bottom loop over the top. Move that loop back to the empty peg beside it, where you removed the stitch originally.
The Pattern
The pattern consists of 5 parts. The first head, the scarf body, the slit, finishing the scarf body and the tail. The first head is 6 inches, the scarf body is 20 inches, the slit is 2 inches, the end of the scarf body is 3 inches and the final tail is 6 inches.
Crochet cast on 6 pegs in the direction you choose. It doesn’t matter.

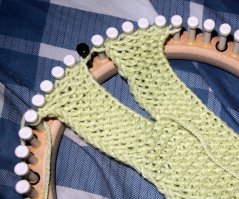
The head after increasing to 18 pegs
The Head
Row 1: Sl, K all, HS
Row 2: Sl, P all, HS
Row 3: Sl, K all, HS
Row 4: Sl, P all, HS
This is the beginning of the increase
Row 5: M1, K to end, Inc1
Row 6: Sl, P all, HS
Row 7: Sl, K all, HS
Row 8: Sl, P all, HS
Repeat rows #5-8 6 times and there will be 18 pegs cast on.
Row 9: Sl, K all, HS
Row 10: Sl, P all, HS
Repeat Rows 9&10 4 times for a total of 8 rows
Row 11: D1, K all, D1
Row 12: S1, P all, HS
Row 13: Sl, K all, HS
Row 14: Sl, P all, HS
Repeat rows #11-14 3 times for a total of 12 rows. There should be 12 pegs cast on.
The Body
Row 15: Sl, K all, HS
Row 16: Sl, P all, HS
Repeat rows 15&15 80 times (160 rows) or until you’ve reached your desired length. This would make the body 20″ long, excluding the head.
Finished slit
The Slit
This is where it starts getting complicated because you have to cut and reattach yarn. But it’s not that bad!
You’ll be working in short rows, not knitting the entire 12 pegs.
Part 1, with the working yarn at peg 1. You’ll be working pegs 1-6.
Row 17: Sl, K4, HS, Turn
Row 18: Sl, P4, HS, TurnRepeat rows 17&18 12 times for a total of 24 rows.

Another view of the slit
Part 2, cut the working yarn and leave a tail (to weave in at the end). Tie a slipknot and place it on peg 7. You’ll be working pegs 7 to 12.
Row 19: Sl, K4, HS, Turn
Row 20: Sl, P4, HS, Turn
Repeat rows 19&20 12 times for a total of 24 rows. Your working yarn will be on peg 7. Purl all the way back to peg one.
The remaining part of the body
Row 21: Sl, K all, Hs
Row 22: Sl, P all, HS
Repeat rows 21&22 8 times for a total of 16 rows

The final tail remaining
The Tail
This is just the first tail you made but in reverse.
Row 23: M1, K all, Inc1
Row 24: Sl, P all, HS
Row 25: Sl, K all, HS
Row 26: Sl, P all, HS
Repeat rows 23-26 3 times for a total of 12 rows. You should now have 18 pegs with loops on them.
Row 27: Sl, K all, HS
Row 28: Sl, P all, HS
Repeat rows 27&28 4 times for a total of 8 rows.

Finished!
Now you decrease
Row 29: D1, K all, D1
Row 30: Sl, P all, HS
Row 31: Sl, K all, HS
Row 32: Sl, P all, HS
Repeat rows 29-32 6 times for a total of 24 rows. This will leave you with 6 pegs with stitches on the loom.
Finishing touches
Row 33: Sl, K all, HS
Row 34: Sl, P all, HS
Row 35: Sl, K all, HS
Row 36: Sl, P all, HS
Cast off in your desired method. I used the crochet cast off. Wear and enjoy!


You must be logged in to post a comment.