9 Hat Project – 4 out of 9 hats finished, and I’ll teach you how to make them


I’ve got 4 hats finished, 3 done on the Knifty Knitter 36 peg loom and one done on the Boye 31 peg loom. I’m doing pretty good! I’ll show a pic of each and a short tutorial underneath it. I’ve got 5 to go, ones already on the loom (the second for the 31 peg loom) and I’m doing well! I might make more than nine, we’ll see. Or some gloves and socks. I’m using spare and scrap wool I found in my big container.

First, the garter stitch rainbow hat.

OLYMPUS DIGITAL CAMERA OLYMPUS DIGITAL CAMERA

This was a simple hat to make. I used the garter stitch shortcut and made it in about an hour. I didn’t like my cast on, so I knit 4 rows and made a mini brim that you can’t really see.

Basically, the entire hat is done in the garter stitch, and you can add a brim if you like. Gather bind off, sew the top together, done. All knits are e-wrap knits, and I did it on the 36 peg loom. It can be done on any loom.

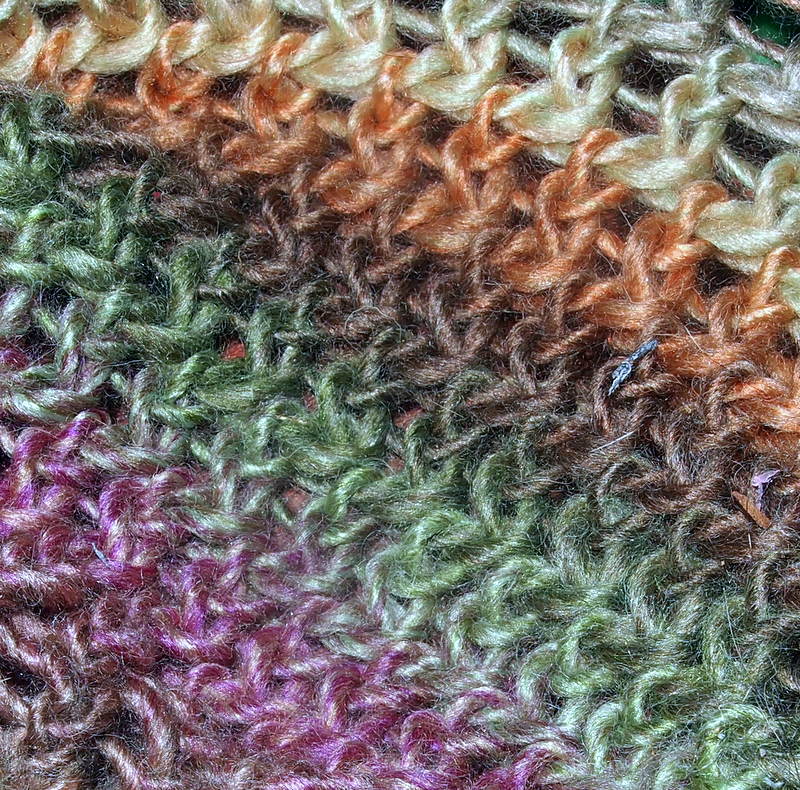
Next, the purple and gray bumpy hat.

OLYMPUS DIGITAL CAMERA OLYMPUS DIGITAL CAMERA

This hat is a bit more complex and requires 2 different colours of yarn or wool.

All knits are e-wrap knits and this was done on the 36 peg loom.

I did the rib stitch for the brim, which is Knit 2, Purl 2 in the round, in the first colour (the gray). This works out well on the 36 peg loom, but if you’re using a loom with odd numbers, just knit or purl the last stitch. Whichever you prefer.

So, I did an e-wrap cast on and did the rib stitch (k2 p2) until I thought it was big enough.

Then I changed colour, and knit (e-wrap) one row so the colour change isn’t as noticable.

Then I purled 5 rows, and switched back to the first colour.

I knit 6 rows, in e-wrap, and then changed colour.

Go back and forth between colours, knitting 1 row and purling 5 for the second colour (which creates the bumps) and end on the first colour, knit 6, and gather bind off. You’re done!

Now for the diamond lace stitch hat done on the 36 peg loom. All knits are e-wrap knits and you can use any size round loom. I always knit my hats in the round.

OLYMPUS DIGITAL CAMERA OLYMPUS DIGITAL CAMERA

The colour is off in these photos, its a gray blue. It’s not as gray as the first one, and its not as blue as the second one.

Cast on in e-wrap and purl a row.

Then do the rib stitch (k2, p2 in the round) for as large as you want the brim to be.

The repeat for the pattern is knit one row, figure 8 stitch the next row, end on a knit row, and gather bind off.

The fourth hat is the first on the 31 peg loom, and has a pom-pom. It can also be made on any size loom.

OLYMPUS DIGITAL CAMERA

I don’t have a pic of me modelling it because its too small.

Knit about 12-14 rows and then fold the yarn up and make a brim.

Knit one row

Purl one row

Figure 8 stitch one row.

Repeat the knit, purl and figure 8 until it’s at the size you want it to be, and gather bind off and sew, add a pom pom if you’d like, and you’re done!

So those are my first four hats. Enjoy, and go knit!

Baby sweater/cardigan on the loom tutorial with pics


I made this adorable little sweater for my nephew, Hunter, on a 31 peg Boye loom (I used 30 pegs) knitting 3 flat panels. I’ll show you how to do this in my tutorial. Here’s the sweater:

OLYMPUS DIGITAL CAMERA

This is a really quick and easy tutorial.

What you need

A knitting loom with at least 30 pegs. I used a Boye 31 peg loom.

A stationary marker

About 100 yards of each colour (if you choose to switch colours) or 200 yards of one colour.

Knitting tool.

Crochet hook (if you choose to bind of with the crochet bind off)

How to do a figure 8 stitch

Tapestry needle to sew the parts together.

The pattern

First you’re going to make the back, starting with the left sleeve. It’s all done in a single flat panel. All knits are e-wrap knits

Put a stationary peg marker or piece of yard on peg 12.

Crochet (chain) cast on the first 12 pegs, to the marker.

Rows 1, 3 and 5: K2 P2 to the marker

Rows 2, 4 and 6: P2 K2 to the first peg.

That is the cuff of the little cardigan/sweater/jacket.

Now, this is where you need to know the figure 8 stitch, or diamond lace as its often called. You can choose another stitch if you want a different look, but I used the diamond lace stitch, which is e-wrap knit one row, figure 8 knit the next.

Do the diamond lace stitch for 24 rows. I switched colours every 8 rows. Stitch 12 pegs each time, this is making the sleeve.

Now we’re going to make the back.

Cast on 18 pegs (so you have 30 on the loom) and knit back to the first peg.

Do the diamond lace stitch, starting at the first peg, to peg 30.

Do this for 24 rows, or if you think its too small, add an extra 8. If you’re making this a sweater, definitely make 32 rows in diamond lace stitch.

Once the 24 or 32 rows are knit, bind off to the marker. I used the crochet bind off. If you aren’t comfortable with it, you can do it any way. I just think the crochet bind off looks better.

Now, the second sleeve. You’ve bound off to peg 12. Knit to peg 1, and then figure 8 stitch peg 2, and keep going for 24 rows, changing colours as you wish.

Make another cuff using K2, P2 for one row, then P2, K2 for the next.

Crochet cast off 12 stitches.

You’re done the back! Now, if you want to make this a sweater, just make a duplicate of the front and sew them together when done.

OLYMPUS DIGITAL CAMERA


This is what the back of mine looks like.

For a cardigan, the left sleeve, you’re going to start the exact same way.

K2, P2 for rows 1, 3 and 5 to the stationary marker.

P2, K2 for rows 2, 4 and 6, to the stationary marker.

Then use the diamond lace stitch for 24 rows to complete the sleeve.

Cast on another 18 pegs so you have 30 cast on, and knit to peg 1, and begin from peg 1 to peg 30 with the diamond lace stitch. Remember, going from peg 12 or 30 to peg 1 is always in e-wrap knit stitch, and going from peg 1 to peg 12 or 30 is always in diamond lace stitch.

Do the diamond lace stitch for 16 rows, and then crochet cast off. I got excited and sewed mine together immediately. This is what the sleeve looks like. It does curl a bit with this particular stitch.

OLYMPUS DIGITAL CAMERA

The left sleeve.


OLYMPUS DIGITAL CAMERA


Flip both sides to the wrong side is facing outwards and sew together, then flip it back to the right side. I always seam together inside out, because it looks better and I’m a bit of a sloppy sew-er.

Now, for the right sleeve, you do the opposite.

Crochet cast on 30 pegs, and keep the marker at peg 12.

Do the diamond lace stitch for 16 rows. That’s 2 colours for me. I wanted to make mine a big bigger, so I added an extra 8 rows, and so the colours met up.

Next, bind off pegs 30 until peg 12. The working yarn is now at peg 12.

Make another sleeve, starting with a knit (because its going from peg 12 to peg 1) and then diamond lace stitch for a total of 24 rows.

You’re almost done!

Now, make the cuff again.

K2, P2 for rows 1, 3 and 5.

P2, K2 for rows 2, 4 and 6.

This is what you’ll have:

OLYMPUS DIGITAL CAMERA

Crochet cast off (or bind off in your favoured way)

Sew this together the same way as before. I lined up the colours first. When I flipped it back to the right side, I folded down the corner of the blue in the middle and sewed it to the panel, making triangle corners, like in the picture.

OLYMPUS DIGITAL CAMERA

Now you’re done! Super simple, can be done in any stitch, and you can do this on a larger loom for any size.

It’s very simple, knitting 2 flat panels in a “T” and sewing them together, if you want to make a sweater. If you want to make a cardigan, you have to do the sleeves separately.

It does curl a bit, but I like it.

This can be done on a bigger loom for an adult. Do one colour, do ten colours, do it in garter stitch (which will become seed stitch when off the loom because you’re working horizontally) or any stitch you please. If you’re using a different stitch than the diamond lace one (knit one row, figure 8 the next, repeat) you may have to add extra rows for size.

Knit, and enjoy! I think I’m going to make one for myself (with the 90 peg Cindwood Afghan loom, I won’t be using all 90 pegs, probably 60 or so. I tried this with a 41 peg loom, for myself, but it was too small so I frogged it)

If you have any questions, or trouble understanding this, just contact me in the comments. Sometimes the way I explain things doesn’t come out right. I think it’s really cute. It’s probably too big for my 3 month old nephew, so he’ll have something to wear next year! His eyes are gray-blue, which is why I chose those colours. The wool is also bulky.

Go knit!

Baby stuff!


I have oodles of gray and blue-gray yarn, I got it from my mom. I made little mittens and socks on the 12 peg flower loom and they turned out super cute. It’s for my nephew, Hunter, and his eyes are blue-gray, so I wanted something to match.

For the socks pattern, I just used a basic round loom pattern and cut the peg use in half. Instead of using 12 stitches for the heel, I used 6 and then decreased to two. It was really easy. I did it all in e-wrap and sewed the ends together inside out, which wasn’t easy. For the mittens, I did the same as the socks,  I used the 12 peg flower loom and followed a round loom pattern for mittens, using 5 pegs for the thumbs, which actually turned out huge. Here are some pics.

OLYMPUS DIGITAL CAMERA OLYMPUS DIGITAL CAMERA

See? It took me about two hours to do all four. Easy peasy!

Next I’m working on a little sweater that opens in the front. I’m making my own pattern, which I will share when it’s done. Basically I’m using the diamond stitch (knit 1 row, figure-8 knit the next row, repeat). I’m changing colours every 8 rows. I am making it on the 31 peg Boye loom, it’s neon green. I used 12 stitches for the arms (basically, I’m doing it in a flat panel) and then increased to 30 pegs, knit the middle in the same stitch with the same colour changes every 8 rows.

It came together pretty fast. For the front, instead of doing one flat panel and sewing it to the first flat panel I made, I’m making two flat panels so the sweater is more of a cardigan. It makes a “T” shape when you’ve knit the entire thing. It’s a super easy way to do sweaters, and you can do it on any loom. I think I might make a sweater on the flower loom for my guinea pig! (He’s going to kill me)

Here’s some pics

OLYMPUS DIGITAL CAMERA

Because I only used a knit stitch, it rolls a bit at the edges. When I have the entire sweater together, I’m going to crochet around it. This is the back of the sweater, which is smaller than the front: the front will have 2 colours (2 rows of 8) on each side (for a total of  rows of 8), while the back has 3 colour changes (3 rows of 8, total)

OLYMPUS DIGITAL CAMERA

This is the first sleeve.


OLYMPUS DIGITAL CAMERA


Here it is sewn together. I still have to do the other side, which will be backwards (instead of knitting the arm first, I’ll be knitting the chest)

I’m also learning how to crochet!


Diamond Lace Hat with Tutorial


I made this awesome hat using a simple technique, and it comes off looking lacey. I used two stitches: the e-wrap stitch and the figure 8 stitch, which I’ll post a tutorial of in the tutorial. Now, here’s what the stitches in the hat look like:

OLYMPUS DIGITAL CAMERA

It only took a couple of hours and looks fabulous. Here’s a pic of it on the loom.

OLYMPUS DIGITAL CAMERA

I used a 36 peg loom because I have a small head. This pattern can be made on any round loom.

And this is me wearing it.

OLYMPUS DIGITAL CAMERA OLYMPUS DIGITAL CAMERA

What You Need

Yarn, not much thought. I used about 3/4 of the small ball you see there. I could make very little out of it. I’m not sure about actual yardage, but enough to make a hat that fits your head.

A round knitting loom, any size, any amount of pegs, odd or even.

A knitting tool and tapestry needle for bind off.

The Pattern

Cast on all pegs in the round in your preferred way. I used the e-wrap cast on, but you can use the crochet cast on, as well.

Start by making a brim of your choice. I used the rib stitch, which is knit 2, purl 2, and did that for about an inch. It can be as big or small as you want.

Row 1-12: Knit 2, Purl 2

Row 13: E-wrap knit stitch

Row 14: Figure 8 stitch

Row 14: E-wrap stitch.

Do this until the hat is at the size you desire, and then cast off using the bind off gather method. Finish on an e-wrap row, this makes the bind off easier.

This method is simple. Take the tapestry needle and run it through peg 1, cast off peg 1, then do the same to peg 2, and pull the yarn tight as you go around the loom.  It will gather the hat into a hat-shape and then flip it inside out and tie it off.

Here’s the figure 8 stitch in a video:

Enjoy! And knit on!


Slouch Hat/Toque – My very first pattern


I say this is my very first pattern because I haven’t altered it from someone else’s. Here is what it looks like completed when worn as a toque. Let me know what you think! The yarn I used wasn’t very thick, worsted weight.

OLYMPUS DIGITAL CAMERA

Here it is when its worn slouchy

OLYMPUS DIGITAL CAMERA

What you’ll need:

A round loom. I used the Knifty Knitter green loom with 35 pegs because I have a small head. Any round loom that fits your head will do.

Yarn. I used leftover. It actually doesn’t take much.

A knitting tool.

A yarn needle.

Stitches

E-wrap cast on.

Gather cast off.

Purl: Tutorial here (Will be abbreviated to P)

E-wrap knit stitch (EW)

The Purl and e-wrap stitches will be used to make the bottom rib stitch.

OLYMPUS DIGITAL CAMERA

Flat Knit Stitch: Tutorial Here (FK)

Figure 8 Stitch: Tutorial Here (F8)

This is a beginner-intermediate pattern because of the different stitches involved

Pattern

Rows 1-10 Use the rib stitch, which is knit one peg, purl the next peg, knit the next peg, purl the next peg, etc, until you come to peg one again, to start the next row with knit one peg, purl the next, etc, for 10 rows.

Row 11, 12: FK

Row 13-17: F8

Row: 18,19: FK

Row 20-26: F8

Row 27-29: FK

Row 30-34: F8

Row 34-36: FK

Continue doing 4 rows of F8 follows by 2 rows of FK until the hat reaches it’s desired size, the last row before finishing should be F8.

Finishing: 2 rows of F8.

4 rows of FK.

Gather bind off.

You’re done.

OLYMPUS DIGITAL CAMERA

Cowl Of Many Stitches – Tutorial and Pattern


I made this awesome cowl with a pattern and altered it slightly. The original pattern is called the “Happily Ever After Infinity Scarf” but I decided to use less pegs (65 peg loom) and make it into a bigger cowl. The original is from Once Upon a Loom by Samantha Pestana. Here’s my results.

image 20131222_122338

The cowl on the 65 peg loom kit. I use the Martha Stewart Kit.

Finished:

OLYMPUS DIGITAL CAMERA

Rockin’ It

20131222_122426

And now for the pattern

What you’ll need:

A knitting loom with at least 48 pegs, so it fits around your neck. If it’s bigger, you can make an infinity scarf, smaller, it’s a cowl, or neckwarmer. Mine is between an infinity scarf and a cowl. It also makes a nice hood!

A knitting tool or crochet hook (if you use the crochet cast on or cast off, you’ll need it)

At least 140 yards of wool or yarn of your choice. I used pretty fuzzy wool.

Yarn needle, for casting off.

Stitches you’ll use

Crochet cast on (or e-wrap cast on, if you prefer. Crochet cast on, IMO, looks better)

Basic e-wrap stitch

Flat knit stitch

Purl stitch (see my tutorial here)

Drop stitch (see a tutorial here)

Figure 8 stitch (see tutorial here)

20131222_092357

An example of the figure 8 stitch

The Pattern

Crochet cast on, or cast on of your choice

1 Purl

2 Flat Knit

3 Purl

4 Flat knit

5 Purl

6 E-wrap

7 Purl

8 Purl

9 Figure 8

10 Figure 8

11 E-wrap

12 Figure 8

13 E-wrap

14 Purl

15 Flat knit

16 Purl

17 E wrap, then yarn over twice, to prepare for the drop stitch

18 Drop stitch (which is purling and releasing the remaining stitches on the peg)

19 E-wrap

20 Purl

21 E wrap, then yarn over twice, to prepare for the drop stitch

22 Drop stitch (which is purling and releasing the remaining stitches on the peg)

23 E-wrap

24 Purl

25 Flat knit

26 Purl

27 E-wrap

28 Figure 8

29 E-wrap

30 Figure 8

31 Figure 8

32 Purl

33 Purl

34 E-wrap

35 Purl

36 Flat knit

37 Purl

38 Flat knit

39 Purl

Cast off. I used the crochet cast off, it creates an edge that looks like this:

20131222_122106

but you can use any cast off you prefer. The recommended is stretchy bind off. Enjoy!